| Champion Hill Home |
| Civil War Album Home |
| Return to Yazoo Pass - Siege of Vicksburg |
![]() round
10:30 a.m., The two divisions led by Alvin P. Hovey and John A. Logan began
their march toward the Confederates posted on the high ground a few hundred
yards to the south. Of the two divisions, Hovey's
men, who had the task of taking the actual crest of Champion Hill where the
Confederate artillery was located, would have the most difficult time
getting to their objective. Their march would be impeded by numerous
ravines, thick undergrowth, and the steep incline of Champion Hill itself.
Add to that an incessant fire from Confederate cannon and rifles of Cumming's
soldier on Champion Hill. Hovey's task was
formidable, indeed.
round
10:30 a.m., The two divisions led by Alvin P. Hovey and John A. Logan began
their march toward the Confederates posted on the high ground a few hundred
yards to the south. Of the two divisions, Hovey's
men, who had the task of taking the actual crest of Champion Hill where the
Confederate artillery was located, would have the most difficult time
getting to their objective. Their march would be impeded by numerous
ravines, thick undergrowth, and the steep incline of Champion Hill itself.
Add to that an incessant fire from Confederate cannon and rifles of Cumming's
soldier on Champion Hill. Hovey's task was
formidable, indeed.
Despite the imposing Champion Hill, standing around 70 feet above the
ground, Hovey's men were quite successful in
gaining possession of it through the creative tactics of one of his brigade
commanders, George F. McGinnis. McGinnis ordered his men to advance a little
and then fall to the ground when he dropped his sword, letting the rebel
rifle fire pass overhead. Using this tactic, McGinnis and Hovey's
other commander James R. Slack reached the top of Champion Hill quite
quickly and with surprisingly little casualties. Once
on top, though, the combat grew fierce and often hand-to-hand. Hovey's
men were victorious, though, and they gained the high ground of Champion
Hill along with the artillery that Cumming's men
had left behind. The defeated Confederates fled back a few hundred yards
south of the crossroads where they would rally.
Logan, on the other wing of the Union advance appeared to be
presented with an easier objective. The ground in front of him was gentle
fields with a gentle slope as it neared the ridge where Lee and Barton's
men were waiting. To avoid hitting the Confederates with a frontal assault,
Logan began extending his line northwestward toward Baker's
Creek in an effort to turn the Confederate left flank. As his Illinois
troops struck, Barton's men on the Confederate far
left gave way and allowed Logan to actually take possession of the Jackson
Road, briefly cutting Pemberton off from his only escape route. Lee's
men on the ridge in between Barton and Cumming held their
ground, preventing an Union occupation of the Jackson Road in his sector.
His brigade now formed a bulge in the Confederate battle line that refused
to give way.
Had McClernand on the Middle Road known that Logan had turned the
Confederate left and that Hovey had captured the crossroads, the battle of
Champion Hill could have ended more quickly than it did. Instead, the Union
assault came to a standstill as the fire died down, allowing the fatigued
Federal soldiers a brief respite. During this
lull, Pemberton was desperately calling for any
reinforcements to rescue his brigades that had been mauled on Champion Hill.
That rescue would come in the form of one of the fiercest counterassaults of
the war.
Assault, May 16


 |
 |
|
|
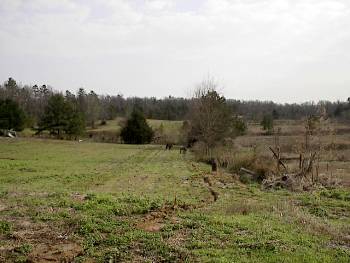
View of the battlefield of
Champion Hill looking south from a point 800 yards
north northwest of the crest of Champion Hill. At around
10:30, Federal Generals Hovey and Logan pressed their troops toward
Confederate positions posted near the treeline in the background |
Enlarge
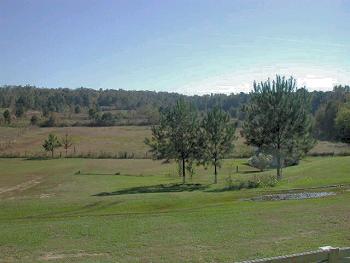
Another view of
the same field, this time from a point farther west. The actual crest of
Champion Hill would be hidden by the treeline near the middle of the
picture. This view is looking south from the Champion Hill Road,
1000 yards northwest of the crest of Champion Hill
Locate on Map
|
|
 |
 |
|
|
This picture is of the Jackson Road trace as it ascends Champion Hill. From this point, the crest would be approximately 400 yards. From this point Hovey and Cumming's troops would have had a clear view of one another. The view is looking south Locate on Map |
View
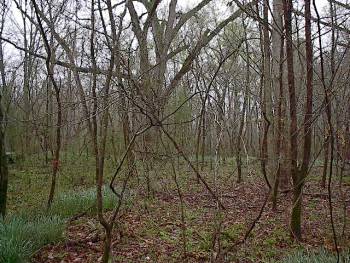
to the right of the Jackson Road trace looking west down Hovey's battlelines as they advanced. The picture was taken from the same spot
as the previous photograph |
