|
(2012)
Enlarge Abington House and
Union Picket Post
On October 5, 1863, General Chalmers began his raid against the Memphis &
Charleston RR with his cavalry division encamped in and around Oxford, MS.
Col. Richardson had his brigade and most of ChalmersÆ artillery at New
Albany. During the 10-day raid, they engaged Union cavalry at New Albany,
LockhartÆs Mill on the Coldwater River, Salem and QuinnÆs Mill on the
Coldwater River. These engagements drove the Union cavalry back to their
base at LaGrange.
The Confederates spent the night of October 10 at QuinnÆs Mill crossing on
the Coldwater River. General Chalmers still had the option of attacking
the fort at Germantown or at Collierville. His choice was Collierville
since his scout Dewitt ōClubfootö Fort had drawn up a detailed map of the
terrain and defenses.
After flanking the Union cavalry at QuinnÆs Mill, the Confederates moved
north to Collierville. They surprised and attacked a picket at the
Abington House and captured 30.
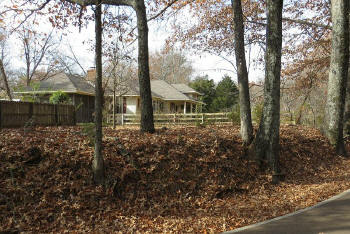
The original Abington House burned early in 1900Æs and the family rebuilt
their house directly in front of the old foundation. The new house shown
in this photo is located in the S-curve on Sycamore Road, about 100 yards
South of Hwy 72.
Enlarged Views: Hit Back Button to return |
|
(2012)
Enlarge Union Earthen Fort
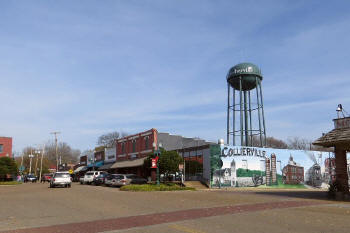
View of Main Street looking North at the corner of Washington St. with the
Town Square to the left. The Union fort was located in the area of this
city block that is bordered by the streets of Main, Washington, & Natchez.
The fort lay within the shadow of the present-day water tower. The Fort
was built with earth walls about 7 or 8 feet high and said to be 120 X 120
feet and contained a powder magazine.
Union forces were distributed along the Memphis & Charleston RR from
Memphis to LaGrange to protect it from attacks by Confederate cavalry
raids. In summer of 1863, the Confederate scouts estimated there were
15,000 Union troops stationed from Memphis to LaGrange. There were earthen
forts built at Germantown, Collierville, Lafayette (Rossville), and
Moscow. Thousands of troops traveled from Corinth to Memphis along the RR
and the roads during the build-up of forces at Vicksburg. Then after the
fall of Vicksburg, many of these troops returned back the same way on
their return to Chattanooga.
During the battle on October 11, General Sherman and his staff occupied
the fort. The Union infantry were deployed in rifle pits near the RR
tracks and the brick RR depot. This section of the railroad was guarded by
the 66 Indiana Regiment. Several companies of the 7th Illinois Cavalry
were camped about a mile north of the town near present-day Tara Oaks
Elementary School. There was a hill in the area where the cavalry was
camped which has been cleared for housing developments. |
|
(2012)
Enlarge Memphis &
Charleston RR
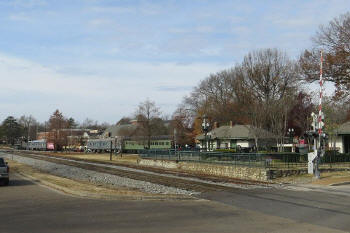
This is a view of the Town Square just North of Main St. The only thing
that is still original to the 1860s is the RR bed that ran East/West. The
elevation has changed but not the location of the RR. In the foreground is
a replica Parrot gun memorial and behind this is an old depot that acts as
home of Chamber of Commerce. The original depot was a brick building used
by the Union as a defensive position. It was located on the North side of
the RR in the middle of Center Street. Center Street crosses the tracks
between the display passenger cars and the red caboose. The original town
was built around the intersection of Poplar Road and Mount Pleasant Road.
Main and Center Streets were added later that formed the present-day town
square.
Just as the Confederates prepared to launch their 3-pronged attack,
General Sherman's East-bound train arrived in town. The train passed the
town but it backed up so the rear car was situated approximately at the
location of the red caboose. This train sat astride the forth-coming
battlefield becoming both an obstacle and a target. The train brought
Generals Sherman, Ewing, and Lightburn and 240 men of the 13 US Illinois
Regulars. Combined with the 66 Indiana Regiment, there were approximately
500 Union infantry entrenched within this town square and the
fort---excluding the companies of the 7th Illinois Cavalry. |
|
(2012)
Enlarge Ridge of the Attack
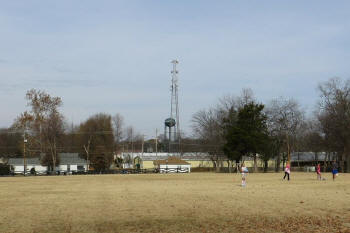
The Confederate cavalry division formed up on this ridge about 600 yards
south of the M&CRR. This is a view looking North from Suggs Park towards
the town square and water tower, with South Street at the northern edge of
the park. The terrain dips down before the RR and gradually rises to the
prominent hill just beyond the corner of Main St. and Poplar Street (Hwy
57). On the far left of the ridge is the Hart house which is mentioned in
the ORÆs as a rallying point. The Hart house was dismantled in the 1940s.
A Civil War Trails marker next to GusÆ Fried Chicken on West South Street
includes a vintage photo that locates the position of this Hart house.
Colonel Richardson arrived with his brigade first. The ORÆs said he formed
up too far to the East and was not facing the Union fort. He was most
likely on the ridge that is East of Mount Pleasant Road and parallels
Keough Road to the south. He shifted his forces left to this location.
Chalmers arrived on the scene and placed his brotherÆs 18 Mississippi
Cavalry Battalion and his light artillery in the center of the line. |
|
(2012)
Enlarge Chalmers Center of
Line
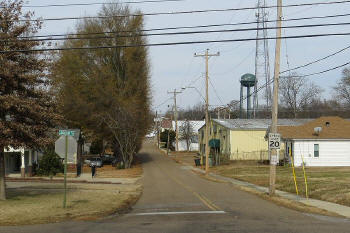
This is a view looking North down Main Street from South Street and
looking towards the town square and water tower. Photos from the early
1900Æs show very little trees in the town. The eye witness reports
describe this as a field. This area would have been the center of the
battle with ShermanÆs train straddling this road just south of the
communications tower.
Chalmers Artillery:
All of the regiments in Chalmers forces were cavalry and usually fought
dismounted. His cavalry division included two artillery battalions: Reneau and Buckner. One of the guns in Reneau Battery was disabled when
the carriage broke during the previous day. The remaining gun may have
been loaned to Buckner Battery. Buckner Batter was armed with one 3-inch
ordnance gun and 4 rare WilliamÆs Guns. The Williams Gun was a rapid-fire,
breech-loading smooth bore gun that fired at 1.6-inch iron shot at a rate
of 25 rounds per minute. Only 42 were made during the war. The Union ORÆs
correctly identify the caliber but incorrectly describe it as a rifled
gun. During the battle, Lt. Holt describes how he moved his guns by hand
from this ridge up to the RR in order to fire close range at the
earthworks.
Flanking Attacks:
Chalmers plan of attack was to send a flank attack in both directions and
hit the Union fort from three sides. Col. Duckworth led the 7 Tenn & 2
Missouri Cavalry to the woods on the West of the fort. Col. McGuirk lead
the 3 Miss and 1 Miss Cavalry far around to the East. McGuirkÆs group
engaged a picket about 1 mile north of town. They attacked the camp of the
7 Illinois Cavalry during their Sunday worship service. The 7 Illinois Cavalry were routed and
fled into the swamps of the Wolf River. The Confederates captured 18
wagons and 150 mules and 100 horses and destroyed what they could not
carry away. However this minor victory diverted McGuirk from his attack on
the fort.
The focus of battle seemed to be centered on the depot, west of the fort.
The Confederate left wing advanced to the RR and boarded the train and set
it on fire. They removed the horses from the cars, including General
ShermanÆs horse, Dolly. They also took General EwingÆs sword from some
baggage. The fire was put out, but the engine was riddled by cannon fire
from across the ridge. After 5 hours, General Chalmers pulled back, as
Union reinforcements double-timed from Germantown.
After the battle of Collierville, ChalmersÆ division headed back to their
base at Oxford. They fought one last battle on October 13th at Wyatt (now
WyattÆs Crossing Public Use Area boat ramp on Sardis Lake near Hwy 7).. |
|
(2012)
Enlarge ShermanÆs Train and
Railroad cut
After the fall of Vicksburg, General Sherman was promoted and placed in
command of the troops. After the Battle of Chickamauga, General Grant
requested Sherman bring his forces to Chattanooga. Sherman traveled with
his family up the Mississippi River and his son caught typhoid fever and
died in Memphis. Only a couple of weekÆs later, ShermanÆs train was headed
East-bound. The train passed the RR depot at Collierville about Noon and
was flagged down. The 13 Illinois Regiment unloaded at the same time the
Confederates sent out a flag of truce. The Regulars formed south of the RR
and along the RR cut. The train backed up so the last car was next to the
Depot. After the truce ended, the firing began and the 13th pulled back
north of the RR and manned the fort, depot and rifle pits.
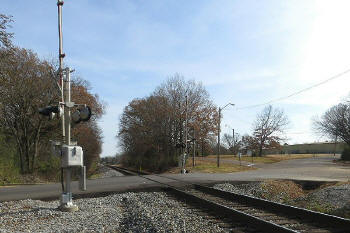
This photo is looking East across Mount Pleasant Road at a RR cut. The
terrain further to the South (right) has been built-up for commercial
property and the RR bed elevation has changed over the years. Local
citizens told of finding cannon balls in the trees along this embankment
on the south side of the RR.
Union reported 164 casualties for this battle. Confederate claimed Union
casualties and prisoners were 320 for the 10 days of the raid. Confederate
reported their losses were 128 casualties for the entire raid including
the 4 other battles in Mississippi. |
