| Battle of Prairie Grove, Arkansas Page6 |
|
|
 |
|
 |
|
|
|
|
|
(2011)
Enlarge Battlefield Tour
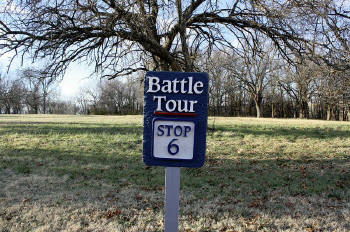
Stop 6: Confederate Right Flank
Tour Guide: Colonel Emmett MacDonalds Missouri cavalry positioned
themselves at the edge of the ridge. Captain Westley Roberts located his
Missouri battery, composed of the only rifled cannons in the Southern Army,
just up the ridge where he and his men withstood a heavy bombardment from
the Union guns
William J. Bechmann III photo
(Dec 2013)
Enlarge Tour Stop-6: Confederate Right
Flank
Billy Richmond photo |
|
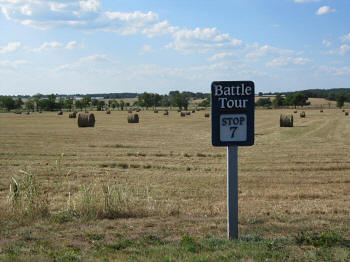
(2011)
Enlarge Battlefield Tour
Stop 7: Borden Wheatfield
Tour Guide: Lieutenant Joseph Fousts Union Missouri battery set up
just east of this location and pounded the ridge with his cannons. Just
north of the battery was the 94th Illinois Infantry, which was supposed to
be a part of the first Federal charge of the day, but they never left the
wheat field. This regiment served as the left flank of Herrons Army with
the end of its line abutting the Illinois River. Ordered to lie down in the
field, the Illinois troops saw the Confederate bullets and shells go over
their heads, resulting in very light casualties for the regiment
William J. Bechmann III photo |
|
|
|
|
 |
|
 |
|
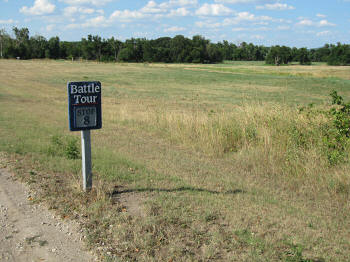
(2011)
Enlarge Battlefield Tour
Stop 8: Illinois River Ford
Tour Guide: Northeast of this location is the main ford of the
Illinois River. General Herron crossed with a small number of troops only to
be driven back by Confederate artillery fire from the ridge. Learning of a
northern ford, the Federals placed Captain David Murphys Missouri battery
on Crawfords Hill to the north and began pounding the ridge with his
cannons fire. After silencing the Southern guns, the majority of Herrons
men used the main ford, then positioned themselves in this prairie and faced
the ridge to the south. Captain Frank Backofs Union Missouri battery sat
just a few yards north of here
William J. Bechmann III photo |
|
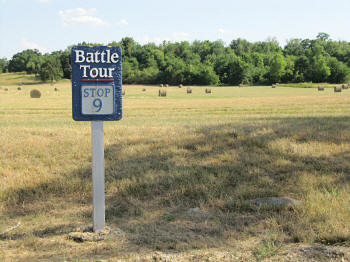
(2011)
Enlarge Battlefield
Tour Stop 9: Borden Cornfield
Tour Guide: General Herrons infantry advanced
through the Borden cornfield south of here to assault the ridge. After both
attacks failed, Confederate counterattacks crossed this ground only to be
shattered by Union cannons firing canister at ranges of less than one
hundred yards at times. One soldier commented afterwards, that you could
walk a long distance without touching the ground because of the dead bodies
in this field and along the slope of the ridge. After heavy casualties for
both armies, the fighting shifted to the west
William J. Bechmann III photo |
|
|
|
|
 |
|
 |
|
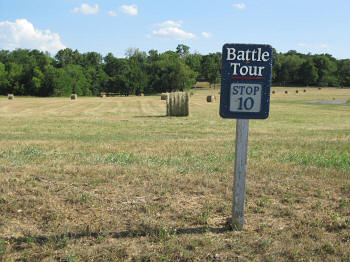
(2011)
Enlarge Battlefield Tour
Stop 10: Position of the 20th Iowa
Tour Guide: Just west of here were the lines of the 20th Iowa
Infantry, which served as the right flank of Herrons Union Army. The
Confederates began to mass on the ridge to the southwest in order to attack
and overwhelm this regiment, which would give the Southerners a victory over
Herrons command. Before the attack began, two cannon shots from the
northwest signaled the arrival of General Blunts Federals who quickly
advanced up the ridge to the west. This forced the Southerners to move their
troops to face the Union threat to their left flank. The 20th Iowa charged
with Blunts soldiers, which included members of the Cherokee and Creek
Nations in the 1st and 3rd Indian Home Guard
 Panorama from Battlefield
Tour Stop 10
Panorama from Battlefield
Tour Stop 10
William J. Bechmann III photo
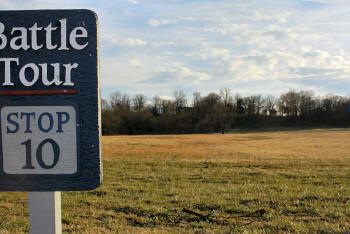
(Dec 2013)
Enlarge View from Tour Stop-10
looking toward the Borden House atop the ridge
Billy Richmond photo |
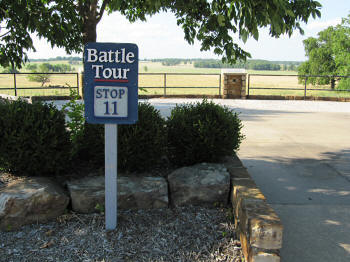
|
(2011)
Enlarge Battlefield
Tour Stop 11: Morton Hayfield (West Overlook)
Tour Guide: The heaviest fighting on the western end of the
battlefield took place just north of here in the Morton hayfield. General
Mosby M. Parsons ordered a Confederate charge composed of his men in the
Missouri Infantry brigade and Colonel Robert G. Shavers Arkansas Infantry
brigade out into the field. The Southern troops suffered heavy casualties
from the Union artillery before withdrawing to the wooded ridge. Robert West
and his family sat out on the hill to the north and watched the entire
battle
William J. Bechmann III photo |
|
|
|
|
 |
|
 |
|
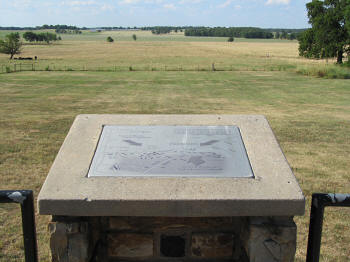
(2011)
Enlarge
Detail Battlefield view
from West Overlook
William J. Bechmann III photo |
|
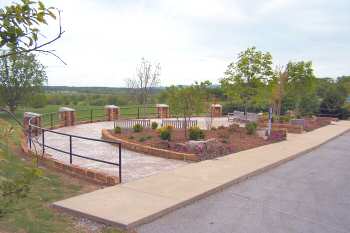
(5-05) The West Overlook is
detached from the main Prairie Grove Battlefield park area, but can be
accessed by following the driving tour. The well-designed facility overlooks
the Morton Hayfield, where Union and Confederate soldiers battled late into
the afternoon. As was the case on the eastern end of the line, the fighting
here also ended in a draw after both sides sustained heavy casualties
Dale Cox photo
Interpretive Markers:
Col.
Alexander Early Steen
Blunt's Arrival
Map-Troop
Positions
Nancy
Morton
Morton Cellar
Brothers
Columbus and Ad Gray
34th
Arkansas Regiment: Col. Brooks
Billy Richmond photos (Dec. 2013) |


