|
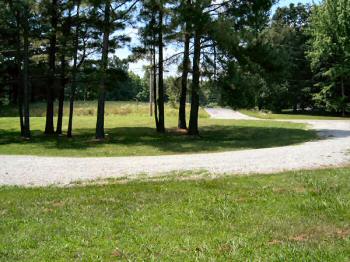
Dunham's Escape Attempt Dashed (South View)
Forrest maneuvered the majority of his force to the left and right flanks
in preparation for his planned double-envelopment. This left George G.
Dibrell's 8th Tennessee as the only Confederate unit facing south toward
the Federal line. Dunham now sensed an opportunity, and ordered an attack
against the Tennesseans. But again, Forrest's artillery showered the
advancing Federals with canister and shrapnel; and once again, Dunham's
men were repulsed.
On the Federal right, Russell's Alabamians and Woodward's Kentuckian's,
dismounted, assailed the Union flank. On the Federal left, Starnes' 4th
Tennessee had passed the Union flank and then pushed northward against it.
Instead of panicking, the Union troops about-faced and continued to fight.
The 4th Alabama was scattered, and the two companies guarding the wagon
train repulsed a Confederate attack. However, frightened teamsters drove
their wagons into a hollow, where they were captured by Southerners.
In the ranks of the 39th Iowa, several officers yelled above the din of
combat, "Rally to the rear." Starnes' triumphant Tennesseans took up a
position in the 122 Illinois' rear, but soon the Southerners were
scattered. Dunham now led men from the 122nd Illinois, 50th Indiana, and
39th Iowa southward in an attempt to escape.
About this time, white flags began to pop up all along the Federal lines.
Forrest send forward an aide under a flag of truce. Dunham rode out toward
the aide, and was surprised when the aide stated, "General Forrest
understands that you have surrendered." Dunham denied having issued any
order to surrender. The aide departed but soon returned with his flag of
truce and a demand from Forrest for Dunham to surrender. The Federal
commander curtly refused any surrender.
Forrest now seemed to be on the verge of another dazzling success.
Suddenly, Forrest received news from a staffer that a Federal force was in
the Confederate rear and was deploying to attack. Fuller's brigade had now
arrived from Huntingdon. Forrest's response to the news was to say,
"Charge them both ways." Captain McLemore had been given the task to, with
his battalion, guard Forrest's rear against Union reinforcements and in a
timely manner report the appearance of such a force. Badly framed orders
caused McLemore to fail in intercepting and delaying the march of Fuller's
brigade.
One of Fuller's regiments got ahead of the rest of the brigade and made a
solo assault on the Confederate artillery from the rear. Forrest,
accompanied by a detachment of 50 men, assailed the Federals, so
impressing them that their advance against the Confederate artillerymen
was checked. Yet soon the rest of Fuller's brigade advanced, capturing
three Confederate cannon and the wagons earlier lost by the Federals.
Forrest's troops escaped to the south, where they rendezvoused at
Lexington. The Battle of Parker's Crossroads had ended |
|
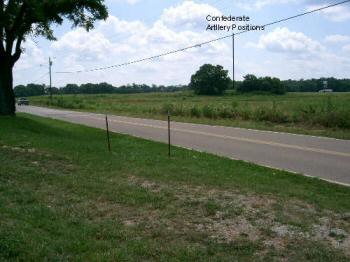
Confederate Artillery Positions |
|
Lexington-Huntingdon Road (South View)
The Lexington Huntingdon Road was the main thoroughfare running through
the battlefield in 1862. In the late hours of the battle, John Fuller's
Federal brigade used this road to surprise Forrest by showing up in his
rear. Today, the treeline to the right in the above picture marks the bed
of the Lexington-Huntingdon Road, and Route 22 is the modern equivalent of
the road, paralleling it to the west. The woods visible in the distance
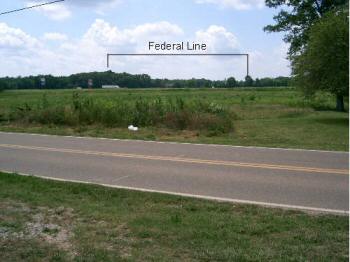
mark the Federal line at the rail fence |
|
The Battle Lines Form (Southeast View)
Forrest's main column began marching past the crossroads. Mistaking this
move for an attempt to escape, Colonel Dunham ordered forward a group of
skirmishers, who were soon repulsed by the Southerners, and moved the rest
of his brigade forward to a line parallel, and to the east of, the
Lexington-Huntingdon Road, facing west. Then Dunham, witnessing the
Confederate movement and fearing for his flank and rear, changed position,
forming a line east of the Lexington-Huntingdon Road running east-west and
facing north.
Forrest responded to Dunham's change of position by forming his men nearly
parallel to the new enemy line. The "Wizard of the Saddle" deployed
Freeman's and Morton's batteries in his center and on both flanks. The
Confederate artillery soon engaged the 7th Wisconsin Battery; it was not
long before the outgunned, outfought "redlegs" (another name for Federal
artillerymen) were forced to withdraw.
The above photo looks over much of the battlefield. In the foreground is the
farm road (today Wildersville Road) used by Forrest's troopers to form a
line; the field behind the road stretches to I-40 (marked by a semi-truck in
the distance), along which the second Federal line was formed. Near where
this picture was taken, Morton's battery was positioned to shell the Union
line |


